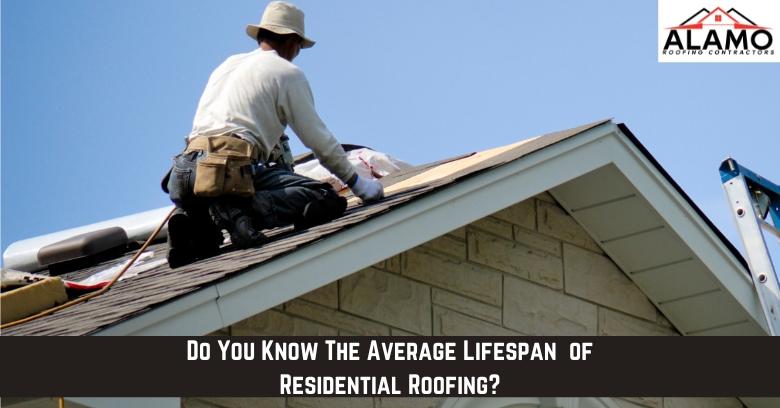
Do You Know The Average Lifespan  of Residential Roofing?

Do You Know The Average Lifespan of Residential Roofing?

An important question that homeowners want to know when shopping for a new roof is how long they can expect that new roof to last.

Although no two residential roofing installations are the same, some factors can predict roof life and what homeowners can expect from theirs.

At the top of that list is hiring the right roofing contractor for the installation!

How Long Does Modern Residential Roofing Last?

Not too long ago, the average lifespan of a residential roofing installation was only 20 to 30 years.

Due to the many advancements in roofing technology and the new roof systems now available, that number has jumped to 40 to 50 years or more.

Yet while today’s roofing systems are more resilient due to their higher quality and better design, materials choice is not the only factor that determines roofing lifespan.

Before hiring a roofing contractor to install any roofing system, homeowners must first ensure they are the right professional for the job.

How Do You Get A Full Life From Any Roof?

A roof that has not been properly installed will not last as long as it should according to the manufacturer’s claims.

Unfortunately, one of the most common reasons why homeowners end up paying for new residential roofing before they expect to is a poor installation by an unqualified contractor.

Whether due to improper technique, lack of attention to detail, or simply poor workmanship overall, these can all result in issues that significantly shorten the life of a new roof.

To prevent this, homeowners must always hire a roofing contractor who is qualified to install their chosen roofing system and will stand behind their work.

Learn About Average Roof Lifespan and How To Prolong It

In this informative residential roofing video, Frank from Alamo Roofing talks about roofing life expectancy and why getting a long-lasting roof depends on hiring the right contractor.

Protect A New Roof By Hiring A Qualified Roof Contractor

There is much more to consider when buying a new roof than just the cost and the manufacturer’s projected lifespan for their product.

Homeowners must also select a highly qualified roofing contractor to correctly install their chosen materials to ensure they get the lifespan their roof should provide.

A certified contractor who provides both manufacturer and workmanship warranties offers important peace of mind to their customers that the roof is installed correctly and with care, minimizing potential problems and ensuring a long roof life.

Qualified roofers are an essential component for every long-lasting roof!

Need A Roof Contractor in Naperville Illinois?

Contact Alamo Roofing For Your Residential Roofing Needs!

Call 219-248-2194 To Schedule A Fast Quote!


Check Out Who is Posting This Article!

https://smb.valleytimes-news.com/article/Do-You-Know-The-Average-Lifespan-of-Residential-Roofing?storyId=66d1bfab55f5e7000894fddd
https://smb.lowndessignal.com/article/Do-You-Know-The-Average-Lifespan-of-Residential-Roofing?storyId=66d1bfab55f5e7000894fddd
https://pr.washingtoncitypaper.com/article/Do-You-Know-The-Average-Lifespan-of-Residential-Roofing?storyId=66d1bfab55f5e7000894fddd
https://smb.theleesvilleleader.com/article/Do-You-Know-The-Average-Lifespan-of-Residential-Roofing?storyId=66d1bfab55f5e7000894fddd
https://smb.prentissheadlight.com/article/Do-You-Know-The-Average-Lifespan-of-Residential-Roofing?storyId=66d1bfab55f5e7000894fddd
https://smb.beauregardnews.com/article/Do-You-Know-The-Average-Lifespan-of-Residential-Roofing?storyId=66d1bfab55f5e7000894fddd
https://pr.hattiesburg.com/article/Do-You-Know-The-Average-Lifespan-of-Residential-Roofing?storyId=66d1bfab55f5e7000894fddd
https://pr.walnutcreekmagazine.com/article/Do-You-Know-The-Average-Lifespan-of-Residential-Roofing?storyId=66d1bfab55f5e7000894fddd
https://pr.thembnews.com/article/Do-You-Know-The-Average-Lifespan-of-Residential-Roofing?storyId=66d1bfab55f5e7000894fddd
https://pr.stylemg.com/article/Do-You-Know-The-Average-Lifespan-of-Residential-Roofing?storyId=66d1bfab55f5e7000894fddd
https://pr.bradfordvillebugle.com/article/Do-You-Know-The-Average-Lifespan-of-Residential-Roofing?storyId=66d1bfab55f5e7000894fddd
https://pr.boreal.org/article/Do-You-Know-The-Average-Lifespan-of-Residential-Roofing?storyId=66d1bfab55f5e7000894fddd
https://pr.timesofsandiego.com/article/Do-You-Know-The-Average-Lifespan-of-Residential-Roofing?storyId=66d1bfab55f5e7000894fddd
https://pr.chestercounty.com/article/Do-You-Know-The-Average-Lifespan-of-Residential-Roofing?storyId=66d1bfab55f5e7000894fddd
https://pr.wncbusiness.com/article/Do-You-Know-The-Average-Lifespan-of-Residential-Roofing?storyId=66d1bfab55f5e7000894fddd
https://pr.ashlandtownnews.com/article/Do-You-Know-The-Average-Lifespan-of-Residential-Roofing?storyId=66d1bfab55f5e7000894fddd
https://pr.millismedwaynews.com/article/Do-You-Know-The-Average-Lifespan-of-Residential-Roofing?storyId=66d1bfab55f5e7000894fddd
https://pr.norwoodtownnews.com/article/Do-You-Know-The-Average-Lifespan-of-Residential-Roofing?storyId=66d1bfab55f5e7000894fddd
https://pr.hopedaletownnews.com/article/Do-You-Know-The-Average-Lifespan-of-Residential-Roofing?storyId=66d1bfab55f5e7000894fddd
https://pr.franklintownnews.com/article/Do-You-Know-The-Average-Lifespan-of-Residential-Roofing?storyId=66d1bfab55f5e7000894fddd
https://pr.naticktownnews.com/article/Do-You-Know-The-Average-Lifespan-of-Residential-Roofing?storyId=66d1bfab55f5e7000894fddd
https://pr.norfolkwrenthamnews.com/article/Do-You-Know-The-Average-Lifespan-of-Residential-Roofing?storyId=66d1bfab55f5e7000894fddd
https://pr.omahamagazine.com/article/Do-You-Know-The-Average-Lifespan-of-Residential-Roofing?storyId=66d1bfab55f5e7000894fddd
https://pr.hollistontownnews.com/article/Do-You-Know-The-Average-Lifespan-of-Residential-Roofing?storyId=66d1bfab55f5e7000894fddd
https://pr.greenvillebusinessmag.com/article/Do-You-Know-The-Average-Lifespan-of-Residential-Roofing?storyId=66d1bfab55f5e7000894fddd
https://pr.davisjournal.com/article/Do-You-Know-The-Average-Lifespan-of-Residential-Roofing?storyId=66d1bfab55f5e7000894fddd
https://pr.columbiabusinessmonthly.com/article/Do-You-Know-The-Average-Lifespan-of-Residential-Roofing?storyId=66d1bfab55f5e7000894fddd

How to Install a Metal Roof (Metal Roof Type, Roof Size…)

worker drilling in final bolts of a metal roof

Metal roofing is gaining popularity due to its durability, energy efficiency, and aesthetic appeal. Installing a metal roof can be a complex process, but with the right tools, materials, and a step-by-step guide, you can achieve professional results. This helpful article will walk you through the entire process of how to install a metal roof, from preparation to the final touches.

Inside this blog:

  • Types of Metal Roofs
  • Preparation for Installation
  • The Installation Process

Types of Metal Roofs

Before diving into the installation process, it’s essential to understand the various types of metal roofing available:

  1. Standing Seam Metal Roofs: These are characterized by raised seams that interlock to create a sleek, modern look. They are highly durable and offer excellent weather resistance.
  2. Metal Shingles: Mimicking the appearance of traditional shingles, metal shingles provide the benefits of metal roofing with a more classic aesthetic.
  3. Corrugated Metal Roofs: Featuring a wavy pattern, corrugated metal roofs are often used in agricultural and industrial buildings but can also be applied to residential homes for a rustic look.
  4. Stone-Coated Metal Roofs: These roofs have a metal base with a stone coating, offering the durability of metal with the texture and appearance of traditional shingles or tiles.

Measuring and Preparing Your Roof

Before purchasing materials, accurately measure your roof. You’ll need to calculate the roof’s square footage to determine how much material to buy. Here’s a simple way to measure your roof:

  • Measure the Length and Width: Measure each section of your roof, noting the length and width.
  • Calculate the Area: Multiply the length by the width to get the area of each section.
  • Add Extra for Waste: Add an additional 10-15% to your total to account for waste and overlapping.

Tools Required for Installing Metal Roof Panels

Tools

  • Tape Measure
  • Chalk Line
  • Tin Snips
  • Metal Cutting Shears
  • Drill/Driver
  • Roofing Nailer
  • Caulking Gun
  • Ladder
  • Safety Harness

Materials

  • Metal Roofing Panels
  • Metal Trim (ridge cap, eave trim, valley flashing)
  • Metal Screws with Rubber Washers
  • Underlayment (synthetic or felt)
  • Roof Vents (if needed)
  • Closure Strips
  • Sealant

Preparation for Installation

Before you begin the installation process, make sure that you have all of the necessary safety equipment. This includes gloves, safety glasses, a hard hat, and a safety harness if you are working on a steep roof.

Remove Old Roofing

If there is an existing roof, it needs to be removed. Metal roofing can sometimes be installed over existing shingles, but it is generally recommended to remove the old roof to inspect the roof deck for damage.

  1. Remove Shingles: Start at the peak and work your way down. Use a roofing shovel or pitchfork to pry the shingles off.
  2. Inspect Roof Deck: Check for rot or damage. Replace any damaged sections with new plywood.
  3. Clean Up: Remove all nails and debris from the roof deck.

Install Underlayment

Underlayment provides an additional layer of protection against moisture. Synthetic underlayment is recommended for metal roofs due to its durability and ease of installation.

  1. Roll Out Underlayment: Starting at the eave, roll out the underlayment horizontally across the roof deck.
  2. Overlap Rows: Overlap each row by at least 6 inches to ensure complete coverage.
  3. Secure Underlayment: Use roofing nails or staples to secure the underlayment to the roof deck.

workers demonstrating how to install a metal roof

The Installation Process

Installing a metal roof is a complex task, so it’s best that a roofing company does the job. However, here’s a general guide for the process:

1. Install the Eave Trim

Eave trim helps direct water away from the fascia and into the gutters.

  • Measure and Cut: Measure the length of the eave and cut the eave trim to size using tin snips.
  • Install Eave Trim: Secure the eave trim to the roof deck with metal screws, ensuring it overhangs the edge of the roof slightly.

2. Install the Metal Panels

Metal panels should be installed starting from the eave and working towards the ridge. Panels are typically installed from left to right or right to left, depending on prevailing winds.

  • Align First Panel: Place the first panel at the eave, aligning it with the edge of the roof. Ensure it overhangs the eave trim by about 1 inch.
  • Secure Panel: Attach the panel to the roof deck using metal screws with rubber washers. Place screws approximately 12-18 inches apart along the ribs of the panel.
  • Overlap Panels: Each subsequent panel should overlap the previous panel by at least one rib. Ensure the overlap is tight to prevent leaks.
  • Cut Panels to Fit: When you reach the end of a row or encounter an obstruction (like a vent), measure and cut the panels to fit using metal cutting shears.

3. Install the Ridge Cap

The ridge cap covers the seam where the two sides of the roof meet, providing a watertight seal.

  • Measure and Cut Ridge Cap: Measure the length of the ridge and cut the ridge cap to size.
  • Install Closure Strips: Place foam closure strips on either side of the ridge to seal the gaps between the ridge cap and metal panels.
  • Secure Ridge Cap: Place the ridge cap over the closure strips and secure it with metal screws spaced approximately 12 inches apart.

4. Install the Flashing

Flashing is used to direct water away from areas where the roof intersects with walls, chimneys, or other protrusions.

  • Measure and Cut Flashing: Measure the areas requiring flashing and cut the pieces to fit.
  • Install Valley Flashing: For valleys (where two roof sections meet), lay the valley flashing down the center of the valley, securing it with metal screws.
  • Install Sidewall Flashing: For areas where the roof meets a wall, install sidewall flashing, ensuring it extends up the wall by at least 4 inches. Secure it with metal screws and seal the edges with roofing sealant.

5. Install the Roof Vents

Proper ventilation is crucial for preventing moisture buildup and maintaining the longevity of your roof.

  • Cut Vent Openings: Measure and mark the locations for roof vents. Cut openings using a reciprocating saw.
  • Install Vents: Place the vents over the openings and secure them with metal screws. Ensure the vents are properly sealed to prevent leaks.

We’ll Install Your Metal Roof

Installing a metal roof is a labor-intensive process, but the benefits of durability, energy efficiency, and aesthetic appeal make it a worthwhile investment. By following this guide, you can ensure a successful installation that will protect your home for decades to come. However, installing metal roofing materials is easier said than done. Reach out to our team at Alamo Roofing to get professional assistance for your roofing needs.

How Much Does a Roof Leak Repair Cost? (2024 Roofing Guide)

Worker installing shingles to repair leak. roof leak repair cost

A leaking roof is a serious issue that can cause significant damage to your home. Understanding the cost of roof leak repairs can help homeowners budget for these necessary fixes and make the right decisions. Below, we’ll cover the factors influencing general roof leak repair cost and much more. By the end of this article, you’ll know exactly how much you can expect to spend to fix a leaky roof.

Inside this blog:

  • Factors Influencing Roof Leak Repair Costs
  • Common Types of Roof Leaks and Their Costs
  • Preventing Future Roof Leaks

Factors Influencing Roof Leak Repair Costs

The cost of repairing a roof leak can vary widely, depending on several factors. Here are the primary considerations:

1. Type of Roof

The type of roof on your home significantly impacts the cost of repairs. Different materials and roof styles have varying levels of difficulty and cost associated with repair work.

  • Asphalt Shingles: These are the most common roofing materials and generally the least expensive to repair.
  • Metal Roofing: Metal roofs are durable but can be more expensive to repair due to the cost of materials and the specialized skills required.
  • Tile Roofing: Tile roofs are costly to repair because tiles are fragile and require careful handling.
  • Flat Roofs: Repairs on flat roofs can vary depending on the type of material used, such as rubber, PVC, or built-up roofing.

2. Extent of Damage

The severity and extent of the roof damage will greatly influence repair costs. A minor leak that affects only a small area will cost less to repair than extensive damage that impacts a large portion of the roof.

  • Minor Leaks: Typically involve patching up small holes or replacing a few shingles.
  • Moderate Damage: Might include replacing larger sections of the roof or repairing multiple leaks.
  • Severe Damage: Extensive damage may require significant repairs or partial roof replacement.

3. Location of the Leak

The location of the leak can also affect the cost. Leaks around chimneys, skylights, or valleys often require more labor-intensive repairs and additional materials like flashing or sealant.

  • Eaves and Ridges: Generally easier to access and repair.
  • Valleys and Flashing: More complex and may require specialized work.
  • Chimneys and Skylights: Often need custom flashing or sealing, increasing labor costs.

4. Roof Accessibility

The ease of access to your roof will impact labor costs. Steep or high roofs that require special equipment or safety measures will generally cost more to repair.

  • Single-Story Homes: Easier and less expensive to access.
  • Multi-Story Homes: May require additional safety equipment and longer ladders, increasing costs.
  • Steep Roofs: Require more safety measures, harnesses, and potentially more labor hours.

5. Labor Costs

Labor costs can vary based on the complexity of the repair and the region in which you live. Professional roofing contractors typically charge per hour, and rates can vary widely.

  • Average Hourly Rates: Can range from $50 to $150 per hour, depending on the region and the contractor’s experience.
  • Emergency Repairs: Often come with higher labor costs due to the urgency and potential after-hours work.

6. Materials and Supplies

The cost of materials required for the repair, such as shingles, underlayment, flashing, sealants, and other supplies, will also affect the overall cost.

  • Quality of Materials: Higher-quality materials will cost more, but may offer better durability and a longer lifespan.
  • Quantity: The amount of materials needed will depend on the extent of the damage.

A zoom in of a roof leak

Common Types of Roof Leaks and Their Costs

Understanding the typical causes of roof leaks can help homeowners estimate potential repair costs. Here are some common types of roof leaks and the associated repair costs:

1. Shingle Damage

Cause: High winds, hail, or aging can cause shingles to crack, curl, or blow off, leading to leaks.

Repair Cost: Replacing a few shingles typically costs between $150 and $300. Extensive shingle damage can cost $500 or more.

2. Flashing Leaks

Cause: Improper installation or deterioration of flashing around chimneys, vents, and skylights.

Repair Cost: Flashing repair costs can range from $200 to $500, depending on the complexity and location of the flashing.

3. Gutter Issues

Cause: Clogged or damaged gutters can cause water to overflow and seep into the roof, leading to leaks.

Repair Cost: Cleaning gutters generally costs $100 to $200. Repairing or replacing damaged gutters can cost $300 to $600.

4. Vent Boot Leaks

Cause: Cracked or damaged vent boots can allow water to penetrate around roof vents.

Repair Cost: Replacing a vent boot typically costs between $200 and $400.

5. Skylight Leaks

Cause: Improper sealing or cracked skylights can lead to leaks.

Repair Cost: Skylight repairs can range from $300 to $800, depending on the extent of the damage.

6. Valley Leaks

Cause: Valleys, where two roof slopes meet, are prone to leaks if the shingles are damaged or improperly installed.

Repair Cost: Valley repairs can cost between $300 and $1,000, depending on the length and severity of the damage.

Preventing Future Roof Leaks

Preventing future leaks involves regular maintenance and timely repairs. Here are some tips to keep your roof in good condition:

  1. Regular Inspections: Conduct regular roof inspections, especially after severe weather, to catch potential issues early.
  2. Keep Gutters Clean: Clean gutters regularly to prevent water overflow and damage to the roof.
  3. Cut Overhanging Limbs: Trim trees and branches that overhang the roof to prevent damage from falling debris.
  4. Ensure Proper Ventilation: Proper attic ventilation can prevent heat and moisture buildup, reducing the risk of damage to shingles and underlayment.
  5. Address Minor Issues Quickly: Fix small problems as soon as they arise to prevent them from becoming larger, more expensive repairs.

Contact Us for Professional Roofing Services

Dealing with a roof leak can be stressful and costly. At Alamo Roofing, we understand the importance of a reliable, efficient roof repair service. Our team of experienced professionals is ready to assist you with any roofing issues, from minor leaks to major repairs. If you suspect a leak in your roof, don’t hesitate to reach out to us.

Related Resources from Alamo Roofing
Storm Damage? Read Our Emergency Guide →

How to Install Architectural Shingles (Where to Nail, Which Tools to Use, & More)

how to install architectural shingles

Installing architectural shingles can significantly enhance the aesthetic appeal and durability of your roof. These shingles are designed to add a three-dimensional texture and appearance to your roof. They are more durable and have a longer lifespan compared to traditional three-tab shingles. This insightful article will walk you through the steps of how to install architectural shingles, from preparation to completion.

Inside this blog:

  • Why Choose Architectural Shingles?
  • How to Install Roof Shingles: Preparation
  • Installing Underlayment and Ice and Water Shield
  • Installing Flashing

Why Choose Architectural Shingles?

Before diving into the installation process, it’s essential to understand the benefits of architectural shingles:

  1. Durability: Architectural shingles are thicker and more durable than traditional three-tab shingles, offering better resistance to wind and impact.
  2. Aesthetic Appeal: They add a three-dimensional look to your roof, enhancing your home’s curb appeal.
  3. Longevity: They typically come with longer warranties, often ranging from 30 years to a lifetime.
  4. Value: While slightly more expensive, their durability and lifespan make them a cost-effective option in the long run.

Tools and Materials Required

Tools:

  • Roofing nailer or hammer
  • Utility knife
  • Tape measure
  • Chalk line
  • Pry bar
  • Ladder
  • Safety harness
  • Caulk gun

Materials:

  • Architectural shingles
  • Roofing nails
  • Underlayment (felt or synthetic)
  • Ice and water shield
  • Drip edge
  • Ridge cap shingles
  • Starter strip shingles
  • Roofing cement
  • Flashing

How to Install Roof Shingles: Preparation

Before installing architectural shingles, you must prepare. Here’s how:

1. Safety First

Before starting the installation, ensure you have all necessary safety equipment, including a sturdy ladder, safety harness, and gloves. Working on a roof can be dangerous, so taking appropriate safety measures is crucial.

2. Inspect the Roof Deck

Ensure the roof deck is in good condition. Replace any damaged or rotten sections. The deck must be clean, dry, and smooth to provide a stable foundation for the new shingles.

3. Remove Old Shingles

Remove the existing shingles using a pry bar or roofing shovel. Start from the top and work your way down. This process will expose the roof deck. Dispose of the old shingles and nails properly.

4. Install Drip Edge

Install the drip edge along the eaves and rake edges. The drip edge prevents water from getting under the shingles and protects the roof deck edges. Secure it with roofing nails spaced about 12 inches apart.

Installing Underlayment and Ice and Water Shield

  • Install Ice and Water Shield: Apply the ice and water shield along the eaves, valleys, and around any penetrations (vents, chimneys). This self-adhering membrane provides extra protection against ice dams and water infiltration.
  • Lay the Underlayment: Roll out the underlayment, starting from the bottom of the roof and working your way up. Overlap each row by about 2 inches, and secure it with roofing nails or staples. Ensure the underlayment is smooth and free of wrinkles.

Installing Starter Strip Shingles

Starter strip shingles are essential for a secure and waterproof edge. They also provide a straight edge for the first course of shingles.

  • Cut the Starter Strips Cut the tabs off a few three-tab shingles to create the starter strips. Alternatively, you can use pre-made starter strip shingles.
  • Install the Starter Strips Align the starter strips along the eaves, ensuring a 1/2-inch overhang beyond the drip edge. Secure them with roofing nails, placing nails about 3 inches from the edge and spaced about 10 inches apart.

A close view of architectural shingles installed on a roof

Installing Architectural Shingles

1. Mark the Guideline

Snap a chalk line about 6 inches from the eave to use as a guide for the first row of shingles. This ensures a straight and even start.

2. Lay the First Row

Place the first shingle on the left corner, overhanging the edge by about 1/2 inch. Align the bottom edge with the chalk line. Secure it with roofing nails, placing nails just below the adhesive strip and spaced about 6 inches apart.

3. Stagger the Shingles

Stagger the shingles to avoid lining up the seams, which can lead to leaks. Cut about 6 inches off the first shingle of the second row to stagger the joints. Continue this pattern for subsequent rows.

4. Install Remaining Rows

Continue installing the shingles row by row, ensuring they are straight and properly aligned. Use the adhesive strip and the manufacturer’s guidelines to determine the correct nail placement.

5. Trim the Shingles

At the roof’s end, trim the shingles to fit. Use a utility knife to cut the shingles, ensuring a clean and precise edge.

Installing Flashing

Flashing is essential for waterproofing roof intersections and penetrations. It prevents water from seeping into the roof at vulnerable points. Here’s how to install it:

  1. Install Step Flashing: Step flashing is used around chimneys, dormers, and sidewalls. Place a piece of flashing at each shingle course, ensuring it overlaps the shingle below. Secure it with roofing nails.
  2. Install Valley Flashing: For roof valleys, use metal valley flashing or woven shingles. Ensure the valley flashing is installed before the shingles and overlaps the underlayment.
  3. Install Vent Flashing: Apply flashing around roof vents, securing them with roofing nails and sealing the edges with roofing cement.

Common Mistakes to Avoid

  • Incorrect Nail Placement: Nails placed too high or too low can cause shingles to lift or leak.
  • Insufficient Overlap: Not overlapping shingles enough can create gaps for water to seep through.
  • Skipping Underlayment: Skipping the underlayment can lead to leaks and void the shingle warranty.
  • Improper Flashing Installation: Incorrect flashing installation can lead to water infiltration at roof intersections and penetrations.

We’ll Handle Your Roofing Project

Installing architectural shingles can enhance the beauty and durability of your roof, providing long-lasting protection for your home. However, the process requires careful planning, precise execution, and a thorough understanding of roofing principles. If you’re unsure about tackling this project yourself, reach out to Alamo Roofing for professional roofing services.

At Alamo Roofing, we pride ourselves on delivering exceptional roofing services with a focus on quality, safety, and customer satisfaction. Our contractors have the skills required to handle any roofing project. Whether you need a new roof installation, roof repair, or maintenance services, we are here to help.

Why Are My Roof Shingles Turning Black? (5 Probable Causes)

A worker removing black end shingles

Have you been asking yourself, ” Why are my roof shingles turning black“? As you know, roof shingles are an essential component of any home, providing protection against the elements and contributing to the overall aesthetic appeal of the property. However, homeowners often encounter the issue of their shingles turning black. This phenomenon can be concerning, both visually and structurally. Understanding why shingles turn black, the potential effects on your home, and the available solutions can help you maintain a beautiful, functional roof.

Inside this blog:

  • Common Causes of Black Stains on Shingles
  • The Effects of Black Stains on Shingles
  • Solutions for Blackened Shingles

Common Causes of Black Stains on Shingles

Several factors can cause shingles to turn black, each with different implications for your roof’s health and appearance. Here are the primary reasons:

1. Algae Growth

One of the most common reasons for black stains on shingles is the growth of algae, specifically a type known as Gloeocapsa magma. This blue-green algae thrives in humid and warm climates, feeding on the limestone filler in asphalt shingles.

Characteristics:

  • Appearance: Algae appear as dark streaks or patches on the roof, giving it a blackened look.
  • Growth Pattern: Algae spread more easily in shaded areas, which retain moisture longer.

Prevention and Treatment:

  • Zinc or Copper Strips: Installing zinc or copper strips near the roof’s ridge can help prevent algae growth. Rainwater carries trace amounts of metal down the roof, inhibiting algae.
  • Algaecide Shingles: Some manufacturers offer shingles with built-in algaecides that prevent algae growth.
  • Regular Cleaning: Professional cleaning with algaecide solutions can remove existing algae and prevent future growth.

2. Mold and Mildew

Mold and mildew thrive in damp environments and can cause black stains on shingles. These fungi typically grow in areas with poor ventilation and excessive moisture.

Characteristics:

  • Appearance: Mold and mildew can create black, green, or brown stains on shingles.
  • Health Risks: Mold spores can pose health risks to occupants, especially those with respiratory issues.

Prevention and Treatment:

  • Improve Ventilation: Ensuring proper attic ventilation helps reduce moisture buildup, preventing mold and mildew growth.
  • Regular Inspections: Periodic roof inspections can identify and address moisture issues before they lead to mold.
  • Professional Cleaning: Mold and mildew should be professionally cleaned using appropriate fungicidal solutions.

3. Asphalt Bleeding

Asphalt bleeding occurs when the asphalt in shingles melts and rises to the surface. This can be due to excessive heat or manufacturing defects.

Characteristics:

  • Appearance: Asphalt bleeding results in black, oily spots or streaks on the shingles.
  • Material Issues: It often indicates a problem with the shingle’s quality or the installation process.

Prevention and Treatment:

  • Quality Shingles: Using high-quality shingles from reputable manufacturers can reduce the risk of asphalt bleeding.
  • Proper Installation: Ensuring shingles are installed correctly and not exposed to excessive heat can prevent this issue.
  • Replacement: In severe cases, affected shingles may need to be replaced.

4. Environmental Pollutants

Overview: Pollution from nearby factories, vehicles, and other sources can settle on roof surfaces, causing discoloration and blackening of shingles.

Characteristics:

  • Appearance: Pollutant deposits often appear as uniform black or dark stains across the roof.
  • Local Factors: Homes in industrial areas or near busy roads are more susceptible.

Prevention and Treatment:

  • Regular Cleaning: Periodic cleaning can remove pollutants and prevent buildup.
  • Barrier Plants: Planting trees or shrubs can act as a barrier to some airborne pollutants.
  • Air Filters: Installing high-efficiency air filters in your home can reduce indoor pollution.

5. Water Damage

Overview: Water damage from leaks or inadequate drainage can lead to black stains on shingles. Persistent moisture promotes the growth of algae, mold, and mildew.

Characteristics:

  • Appearance: Water damage often causes irregular dark patches or streaks.
  • Underlying Issues: It may indicate issues with the roof’s structure or drainage system.

Prevention and Treatment:

  • Regular Maintenance: Inspect and maintain gutters, downspouts, and flashing to ensure proper drainage.
  • Repair Leaks: Address roof leaks promptly to prevent water damage and staining.
  • Waterproof Barriers: Installing waterproof underlayment can protect against water infiltration.

why are my roof shingles turning black

The Effects of Black Stains on Shingles

Black stains on shingles can have several negative effects, ranging from aesthetic concerns to structural issues:

1. Curb Appeal

Impact: Black stains detract from your home’s appearance, making it look unkempt and potentially lowering property value.

Solution: Regular cleaning and maintenance can keep your roof looking clean and well-cared-for, preserving your home’s curb appeal.

2. Roof Longevity

Impact: Algae, mold, and mildew can degrade shingles over time, reducing their lifespan and necessitating premature replacement.

Solution: Preventive measures, such as installing metal strips or using treated shingles, can extend the life of your roof by preventing biological growth.

3. Energy Efficiency

Impact: Blackened shingles absorb more heat, increasing cooling costs and reducing your home’s energy efficiency.

Solution: Keeping your roof clean and considering lighter-colored shingles can help reflect more sunlight, improving energy efficiency.

4. Health Risks

Impact: Mold and mildew can pose health risks to occupants, especially those with allergies or respiratory issues.

Solution: Ensuring proper ventilation, addressing moisture issues, and regular professional cleaning can mitigate health risks.

Long-Term Maintenance Tips

Maintaining your roof and preventing black stains involves regular inspections and proactive measures:

  1. Routine Inspections: Schedule regular roof inspections, especially after severe weather, to identify and address potential issues early.
  2. Gutter Maintenance: Keep gutters clean and free of debris to ensure proper drainage and prevent water damage.
  3. Tree Trimming: Trim overhanging branches to reduce shade and moisture retention, preventing algae and mold growth.
  4. Attic Ventilation: Ensure your attic is well-ventilated to reduce moisture buildup and prevent biological growth.
  5. Professional Services: Hire professional roofing services for inspections, cleaning, and maintenance to ensure the longevity and appearance of your roof.

Get Rid of Those Black Streaks on Your Roof

Understanding why shingles turn black and taking appropriate measures can help you maintain a clean, durable, and visually appealing roof. Addressing issues through regular cleaning and professional maintenance can prolong your roof’s lifespan and protect your home’s value.

Choosing Alamo Roofing ensures you receive expert advice and high-quality services tailored to your specific needs. With our help, you can prevent black stains, enhance your roof’s appearance, and ensure its longevity. Contact Alamo Roofing and let us keep your home in pristine condition.

Related Resources from Alamo Roofing
Storm Damage? Read Our Emergency Guide →

How Much Does a Metal Roof Cost? (Factors + Considerations)

metal roof cost

The choice of roofing material is a significant decision for homeowners, impacting both the aesthetics and functionality of the home. Metal roofing has gained popularity for its durability, longevity, and aesthetic appeal. However, understanding metal roof cost is vital for making an informed decision. This guide explores the various factors influencing the cost of metal roofs. By the end of this article, you’ll have a clear understanding of what to expect when investing in a metal roof.

Inside this blog:

  • Why Choose a Metal Roof?
  • Factors Influencing Metal Roof Costs
  • Types of Metal Roofing Materials and Their Costs
  • Tips for Choosing the Right Metal Roof

Why Choose a Metal Roof?

Before diving into the costs, it’s essential to understand the benefits that make metal roofing a popular choice:

  1. Durability: Metal roofs can last 40-70 years, depending on the material. They are resistant to cracking, shrinking, and eroding.
  2. Environmentally Friendly: Metal roofs are often made from recycled materials and can be recycled at the end of their lifespan.
  3. Low Maintenance: Metal roofs require less maintenance compared to traditional roofing materials like asphalt shingles.
  4. Aesthetic Appeal: Metal roofs can enhance the curb appeal of any home and are available in various styles and colors.

Factors Influencing Metal Roof Costs

Several factors affect the overall cost of a metal roof:

  1. Type of Metal: Different metals have varying costs. Common types include steel, aluminum, copper, and zinc.
  2. Roof Design: The complexity of your roof’s design, including the pitch, number of dormers, and architectural elements, can impact installation costs.
  3. Roof Size: Larger roofs require more materials and labor, increasing the overall cost.
  4. Geographic Location: Labor rates and material costs can vary by region.
  5. Installation Complexity: Factors such as the condition of the existing roof and accessibility can affect installation costs.
  6. Additional Features: Add-ons like insulation, underlayment, and coatings can increase the cost.

Types of Metal Roofing Materials and Their Costs

1. Steel Roofing

Steel is the most common metal roofing material, available in various finishes and styles.

Types:

  • Galvanized Steel: Coated with a layer of zinc for added protection against corrosion.
  • Galvalume Steel: Coated with an alloy of aluminum and zinc, offering better resistance to corrosion.

Cost: $5 to $12 per square foot installed.

Pros:

  • Affordable: Compared to other metal roofing materials.
  • Durable: Withstands harsh weather conditions.

Cons:

  • Weight: Heavier than aluminum.
  • Prone to Rust: If the protective coating is damaged.

2. Aluminum Roofing

Aluminum is lightweight and highly resistant to corrosion, making it ideal for coastal areas.

Cost: $9 to $16 per square foot installed.

Pros:

  • Corrosion Resistant: Ideal for humid and coastal environments.
  • Lightweight: Easier to handle and install.

Cons:

  • Higher Cost: More expensive than steel.
  • Less Durable: Softer metal, more prone to denting.

3. Copper Roofing

Copper roofing is known for its beauty and longevity, developing a distinctive patina over time.

Cost: $15 to $30 per square foot installed.

Pros:

  • Aesthetic Appeal: Distinctive look with a natural patina.
  • Longevity: Can last over 70 years with proper maintenance.

Cons:

  • High Cost: One of the most expensive roofing materials.
  • Color Change: Patina development may not appeal to everyone.

4. Zinc Roofing

Overview: Zinc is durable and requires low maintenance, with a natural ability to self-heal scratches and minor damage.

Cost: $10 to $20 per square foot installed.

Pros:

  • Durability: Long lifespan with low maintenance.
  • Eco-Friendly: 100% recyclable.

Cons:

  • Cost: More expensive than steel and aluminum.
  • Availability: Less common, which can affect availability and price.

Installation Costs

Installation costs can vary widely based on several factors:

  1. Labor Rates: Labor expenses can vary from $3 to $7 per square foot, based on your location.
  2. Roof Complexity: More complex roofs require more time and skill, increasing labor costs.
  3. Removal of Old Roof: Removing an old roof can add $1 to $5 per square foot to the total cost.
  4. Underlayment and Insulation: Adding these layers can enhance energy efficiency and protection but will increase costs.

A house with metal roof

Long-Term Value of Metal Roofs

While the initial price of metal roofing may be more expensive than other materials, the long-term value often justifies the investment. Consider the following:

  1. Longevity: Metal roofs last significantly longer than asphalt shingles, reducing the need for replacement.
  2. Energy Savings: Reflective properties can lower cooling costs, leading to long-term energy savings.
  3. Maintenance: Lower maintenance requirements can save on repair costs over the roof’s lifespan.
  4. Resale Value: A metal roof can increase your home’s resale value, appealing to potential buyers looking for durable and energy-efficient homes.
  5. Insurance Savings: Some insurance companies offer discounts for homes with metal roofs due to their durability and resistance to fire and severe weather.

Tips for Choosing the Right Metal Roof

Selecting the right metal roof involves more than just cost considerations. Here are some tips to guide your decision:

1. Evaluate Your Climate

Choose a material that withstands your local weather conditions. For example, aluminum is excellent for coastal areas, while steel is suitable for regions with heavy snowfall.

2. Match Your Home’s Style

Ensure the color and style of the metal roof complement your home’s architecture and exterior design.

3. Research Contractors

Choose a reputable roofing contractor with experience in metal roof installations. Read reviews, check references, and ask for proof of insurance.

4. Consider Energy Efficiency

Look for roofs with Energy Star ratings or other certifications that indicate energy efficiency.

5. Think Long-Term

Focus on the long-term benefits and durability of the roof rather than just the upfront cost.

Invest in Quality With Alamo Roofing

Choosing to install a metal roof is a significant investment that offers numerous benefits, from durability and energy efficiency to aesthetic appeal and low maintenance. Understanding the costs involved and considering all factors will help you make an informed decision that suits your budget and home needs.

Ready to transform your home with a stylish metal roof? Contact Alamo Roofing today for a professional consultation and quote. Our team of experts is here to provide you with the best roofing solutions tailored to your specific needs. Don’t wait – invest in the long-term value and beauty of your home with a metal roof from Alamo Roofing. Reach out to us now and take the first step towards a secure and energy-efficient roof!

(219) 248-2194